Implement AYL Ad Tags from Google Ad Manager
- Denise Ortiz Caso (Unlicensed)
Owned by Denise Ortiz Caso (Unlicensed)
Last updated: Oct 18, 2018
1- Connect to Google AM Platform
- Launch the platform: https://admanager.google.com
- Enter your login/password details
2- Create an Ad Unit
Always refer to the Help button displayed as a ? for every field.
- Click on Inventory > Ad units
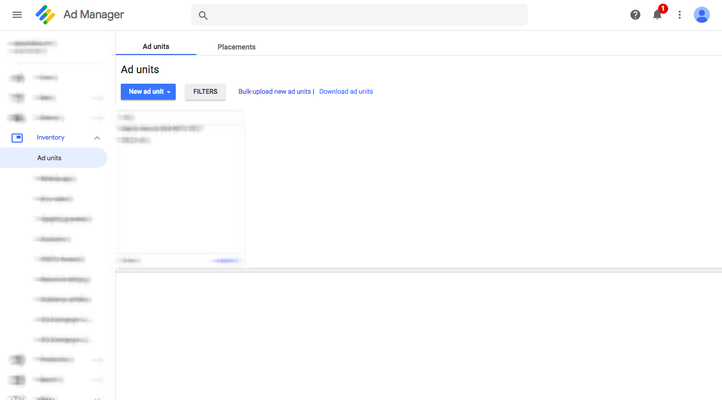
- Click on New ad unit > Current level
- Name the Ad unit as you want
- In Sizes, select:
- Fixed Size
1x1
The information shown in the screenshots are essential to the integration of our AYL tags. However, there are some Optional information that might be important for each publisher.
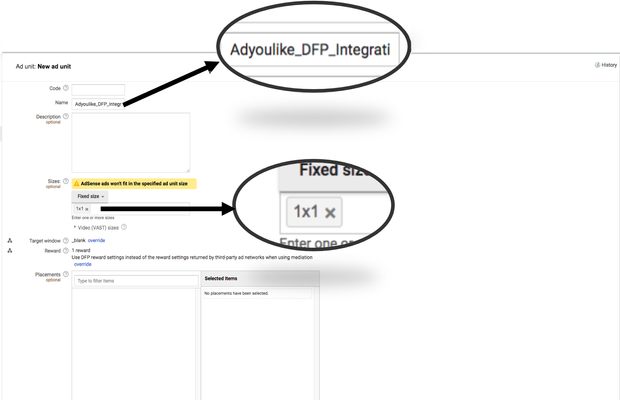
- Click Save.
Ad units are associated with line items. So before creating an order with line items, you must create an ad unit.
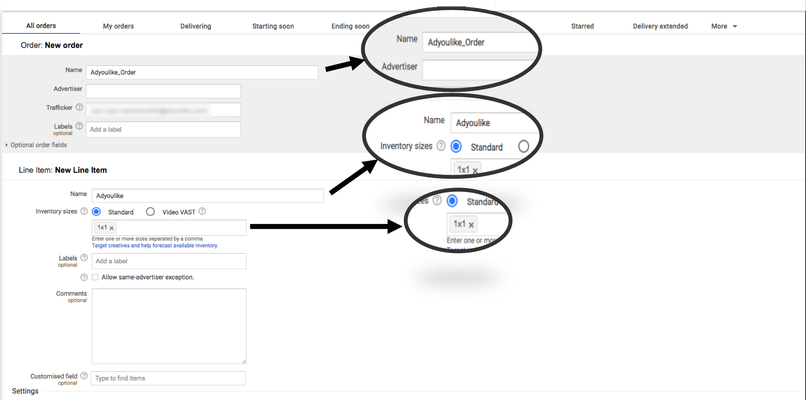
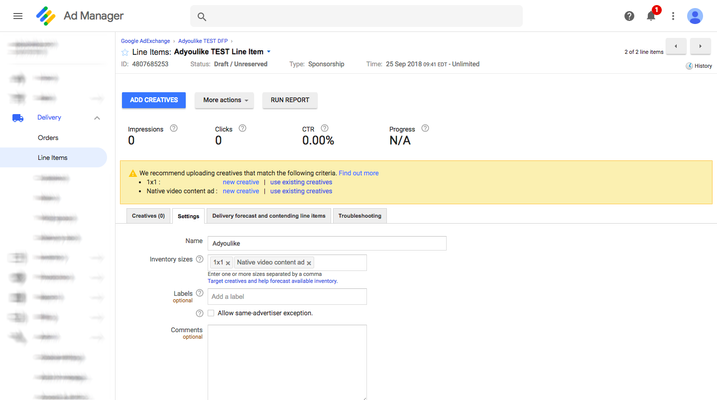
3- Create an Order
The creation of an order automatically generates a New line item.
- Click on Delivery > Orders
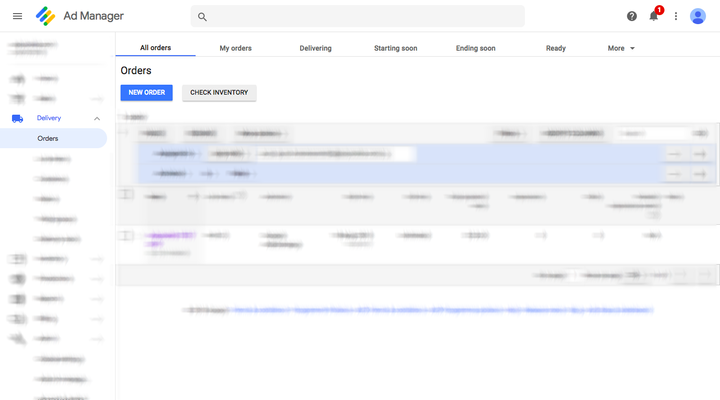
- Click on New order
- In Order: New order section, name the order as you want - here Adyoulike_Order
- In Line item: New Line Item section, name the line item
- Set the Inventory sizes to:
- Standard
- 1x1
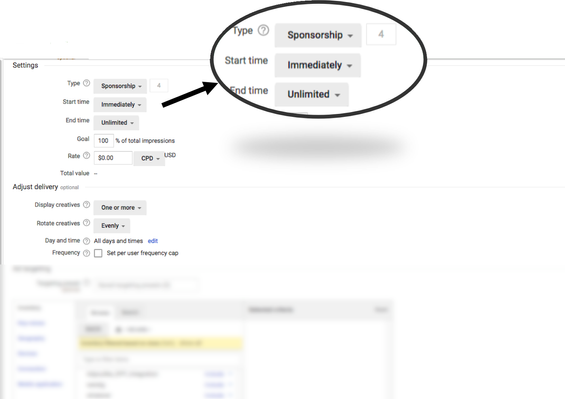
- In Settings section, fill in:
- Type with Sponsorship
- Start time with Immediately
- End time with unlimited
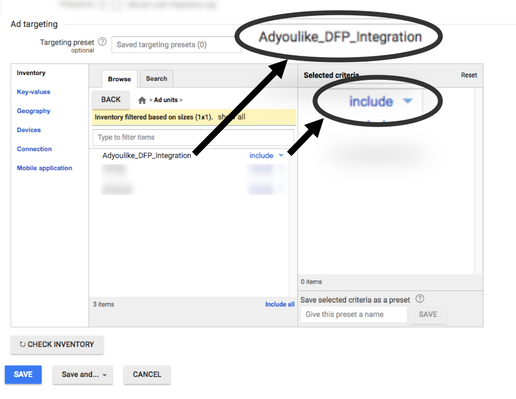
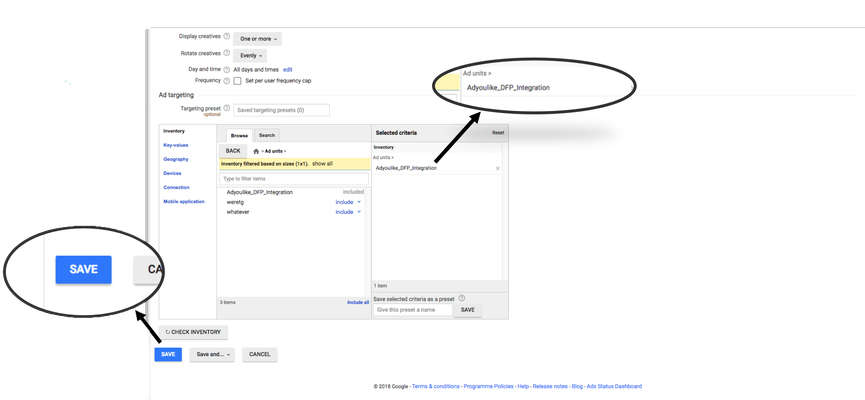
- In Ad targeting section > Inventory tab on the left navigation > Browse tab on the center panel > Ad units folder, click include next to the Ad unit name previously created - here Adyoulike_DFP_Integration. The ad unit name will appear in the Selected criteria area on the right.
- You can filter by Geography on the left navigation:
- click Geography,
- search the location you want,
- click include/exclude to show the selection in the Selected Criteria area
- You can also choose a specific device
- Click Save
The line item linked to the ad unit is created.
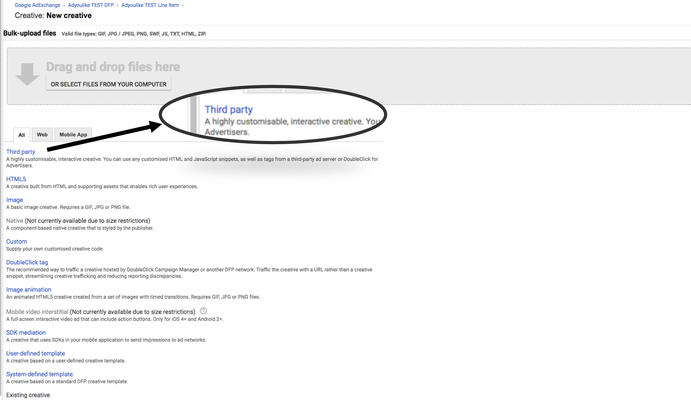
4- Create Creatives
- Click on the previously created Line item > Add creatives
- Select Third party type
- Insert the tag provided by Adyoulike into the Code area
- Always uncheck the Serve into a SafeFrame option
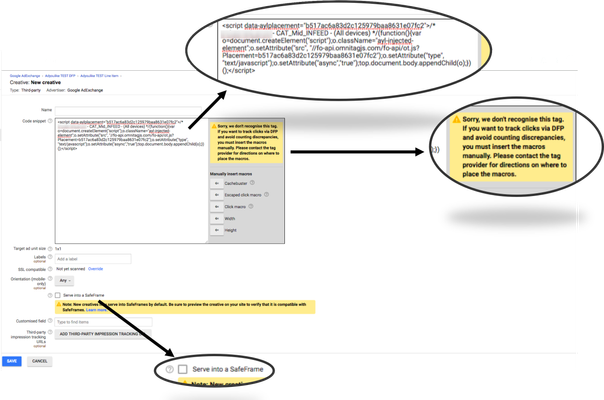
- Click Save.
Get Started
, multiple selections available, Use left or right arrow keys to navigate selected items